Before working with fire in the lab, be sure that any long hair is tied back and that shirt sleeves do not hang down. Prior to lighting the burner, set up supplies near a a gas supply valve and have all required equipment within reach:
Article Summary: It may look easy, but there are many safety measures to keep in mind with lighting a Bunsen burner. Here is step-by-step photo guide and video.
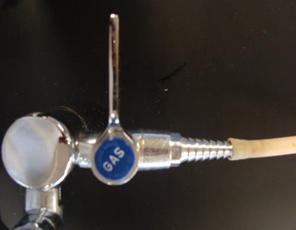
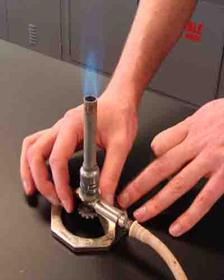
There should be a rubber tube connected to the Bunsen burner. Connect the opposite end of that tube to the gas supply, typically a pointed nozzle with a handle labeled GAS.
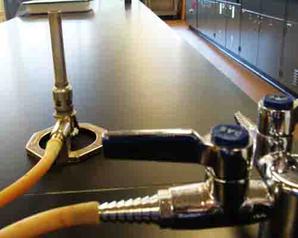 Bunsen Burner Connected to Gas Supply with Rubber Tube" width="298" height="254" />
The photo to the right shows a gas supply valve in the OFF position (handle right angle to nozzle) . The photo to the right of #1 shows the gas supply valve in the ON position (handle parallel to nozzle).
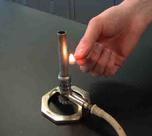
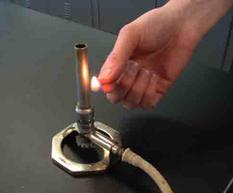
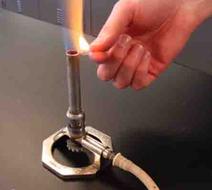
Immediately after turning on the gas, light the match and slowly run it up the side of the barrel until it ignites the gas. (This is done for safety. If the match was held directly over the barrel, a high flame could burn the hand.) Shake match out and place it in glass dish.

The image to the right depicts the different working parts of a Bunsen burner. The gas inlet is where one end of the rubber tube is connected. Both the barren and the cog-shaped control to the needle valve rotate to adjust the height of the flame.
Once the burner is lit, the cog in the base can be manipulated to control the height of the flame. The flame should be adjusted so that there is a clear blue flame surrounding an inner blue cone.
Once the flame is lit, it must be tended at all times. If you need to leave the burner, for any reason, extinguish the flame by turning the gals valve handle to the OFF position.